If you’ve ever looked at your Zoho CRM list and thought, “I need to email all these people… but there’s no way I’m doing this one by one”, you’re not alone.
That’s exactly why Zoho CRM includes a Mass Email feature. It lets you send one email to many leads or contacts at once without building workflows, exporting lists, and turning it into a whole project.
In this guide, we'll explore the process in a way that’s easy to follow, even if you’re new to Zoho CRM.
Mass Email simply means sending a single email to multiple records at the same time—usually from the Leads or Contacts module.
So instead of manually emailing 30, 50, or 100 people one by one, Zoho CRM lets you select the people you want and send one email to all of them using a template.
Step 1: Choose Where You’re Sending the Email
Before you click anything, start with one decision. Are you emailing Leads or Contacts?
This matters because Zoho CRM keeps them in separate modules, and mass email works within a module.
- Choose Leads if you’re emailing prospects or new inquiries
- Choose Contacts if you’re emailing customers or existing relationships
Once you’re clear, open the module from your Zoho CRM menu.
Step 2: Pick the Right People
Now you’ll choose who gets the email. You can do this in two ways, depending on what you need.
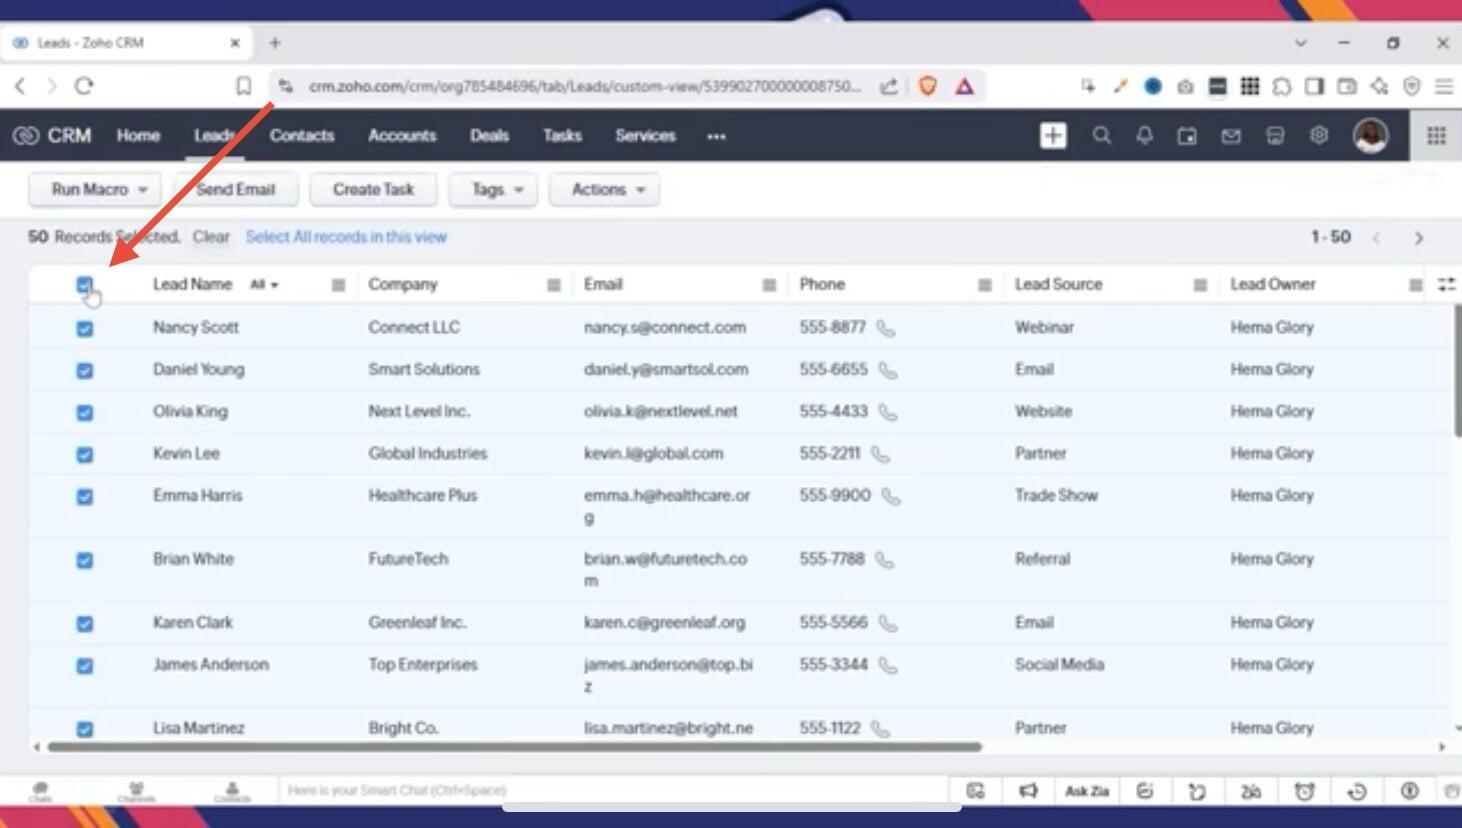
Option A: Select People Manually
If it’s a small group and you already know who you want:
- Tick the checkboxes next to the records
You can select up to 100 records at a time in Zoho CRM
This is great when you’re sending to a specific shortlist.
Option B: Use a List View
If you’re trying to email a category of people like “Leads from email” or “Leads from a region”—use a list view sometimes called a custom view.
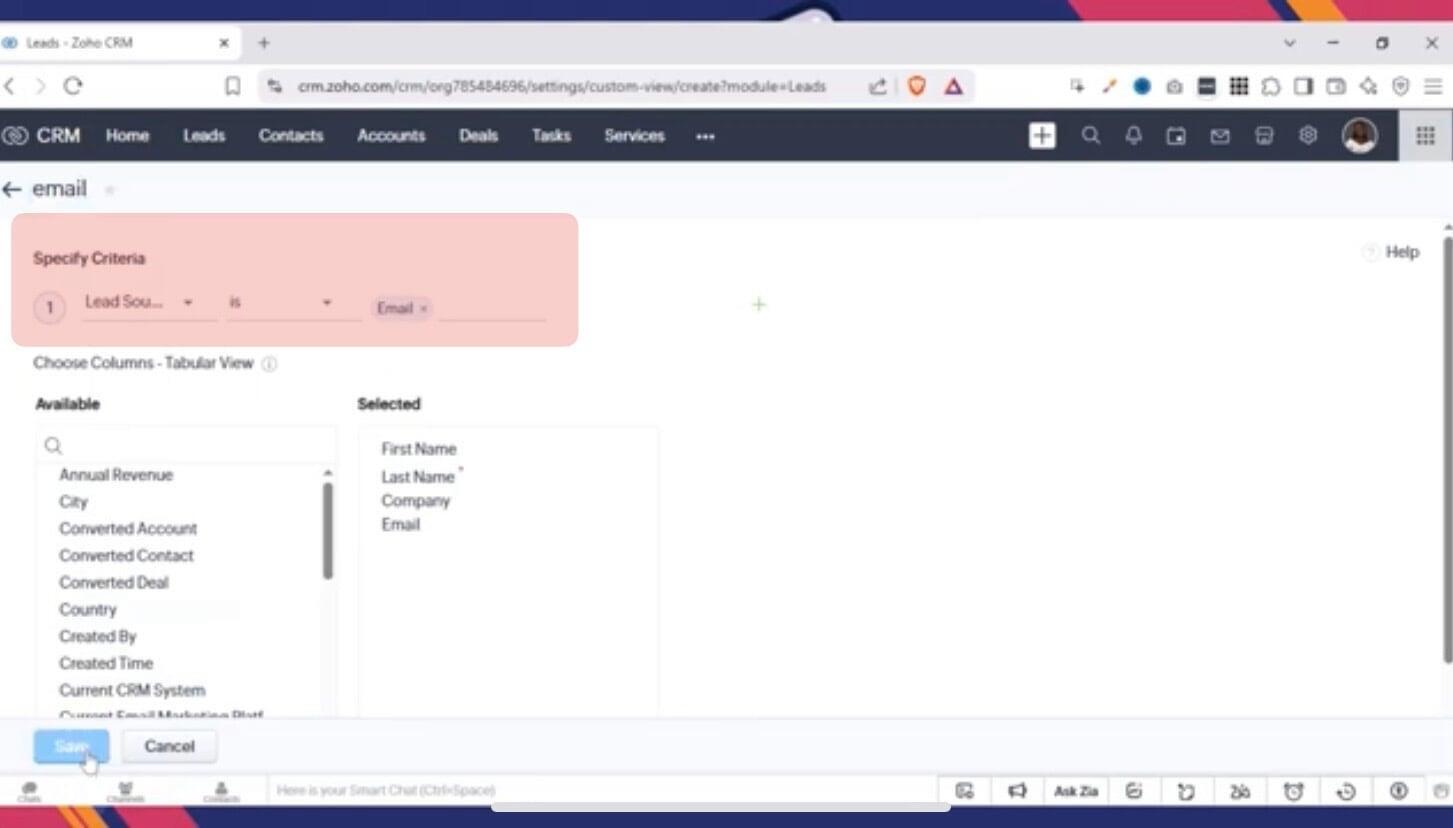
For example, you can create a view where:
- Lead Source = Email
- Or your leads match a location, status, or any criteria you choose
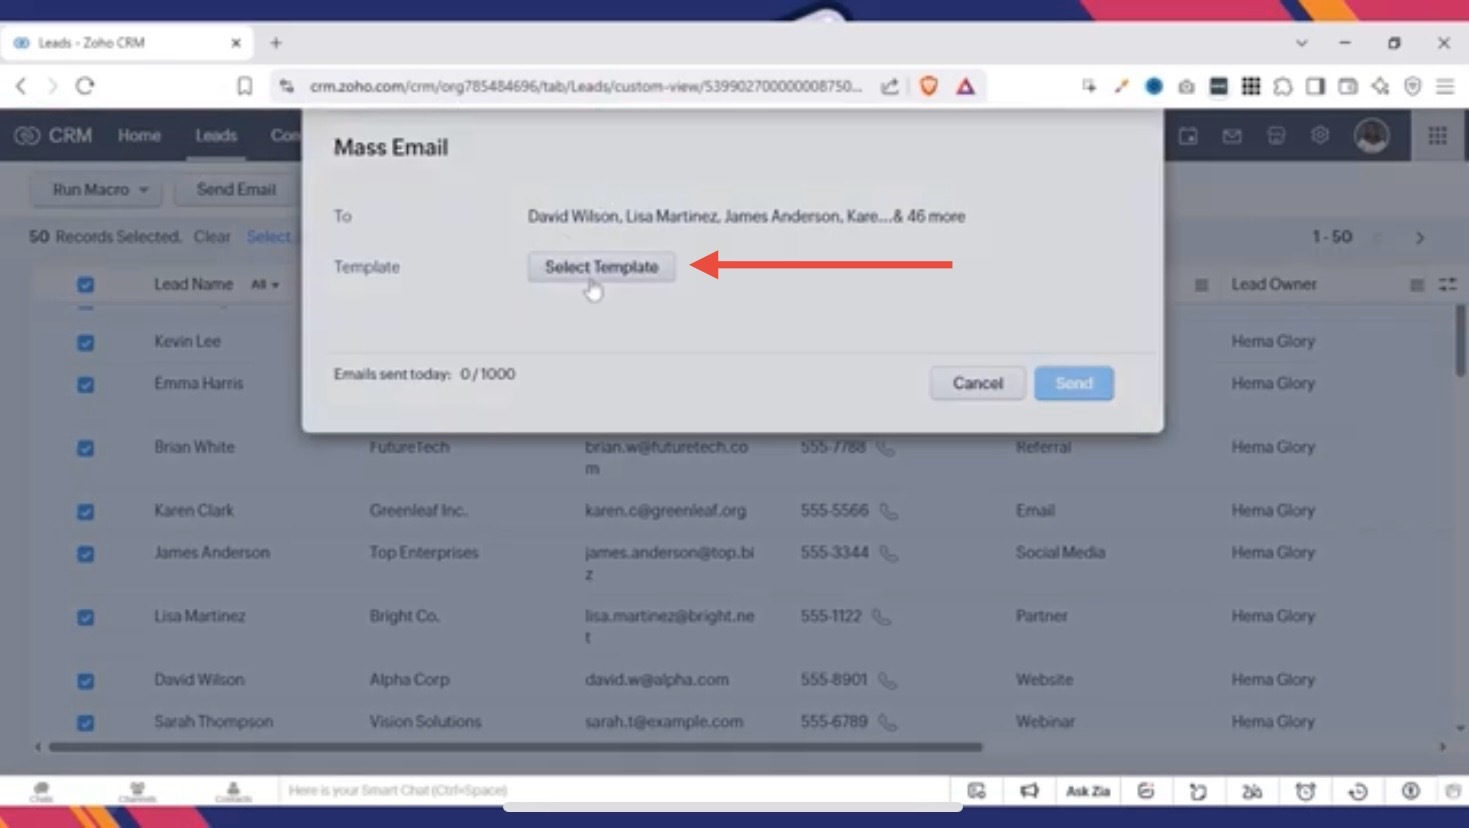
Step 3: Open the Mass Email screen
Once your records are selected, click Send Email.
Zoho CRM will open the Mass Email page, which is basically your setup screen. This is where you’ll choose the email template, select sending options, and decide if you want follow-up actions.
Step 4: Choose Your Email Template
In Zoho CRM, mass emails are sent using templates, so you’ll pick the one you want to use here.
On the Mass Email page:
Select your email template
- Confirm the sender email
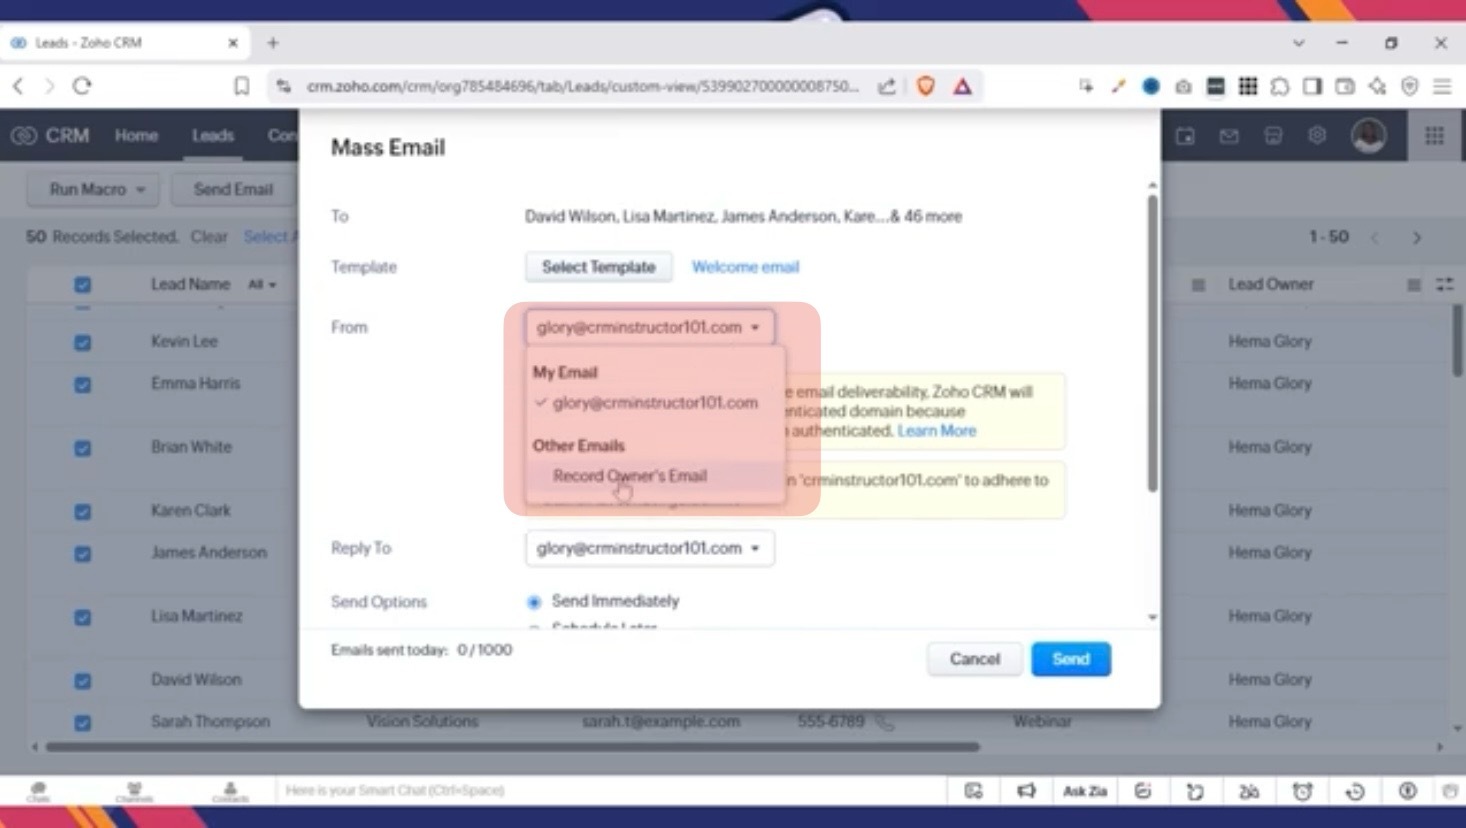
Choose the reply-to email
A helpful tip here: if you’re working with a team, you can set replies to go to the record owner. That means whoever owns that lead will get the reply automatically—which keeps things organised.
Step 5: Decide When to Send
Next, choose whether you want to send the email:
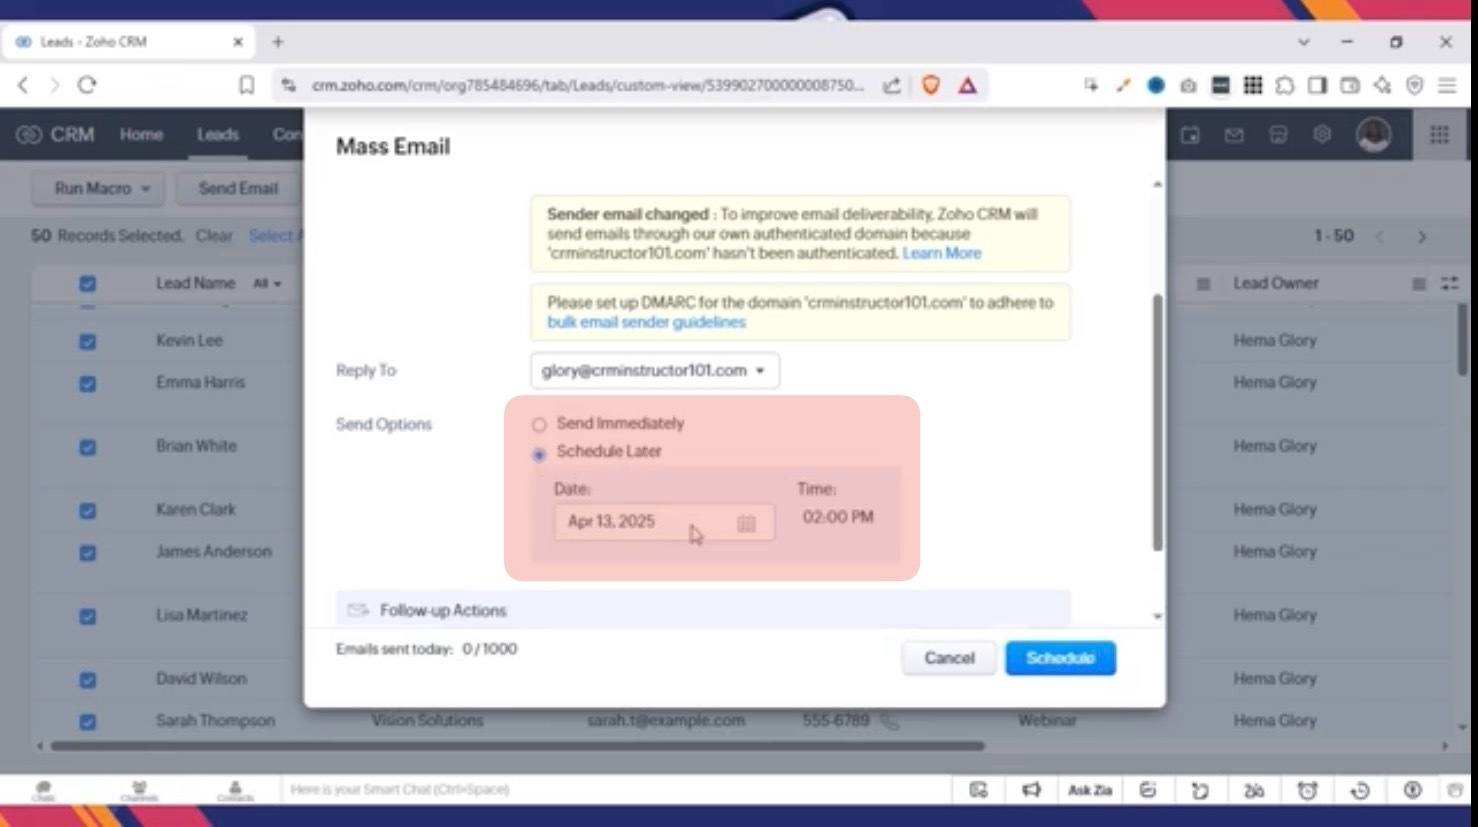
- Immediately, or
- Scheduled for later
Scheduling is useful when you want the email to go out at a specific time (for example, during business hours), or when you’re preparing emails in advance.
Step 6: Add Follow-Up Actions
This is where Zoho CRM becomes more than just "send and hope”.
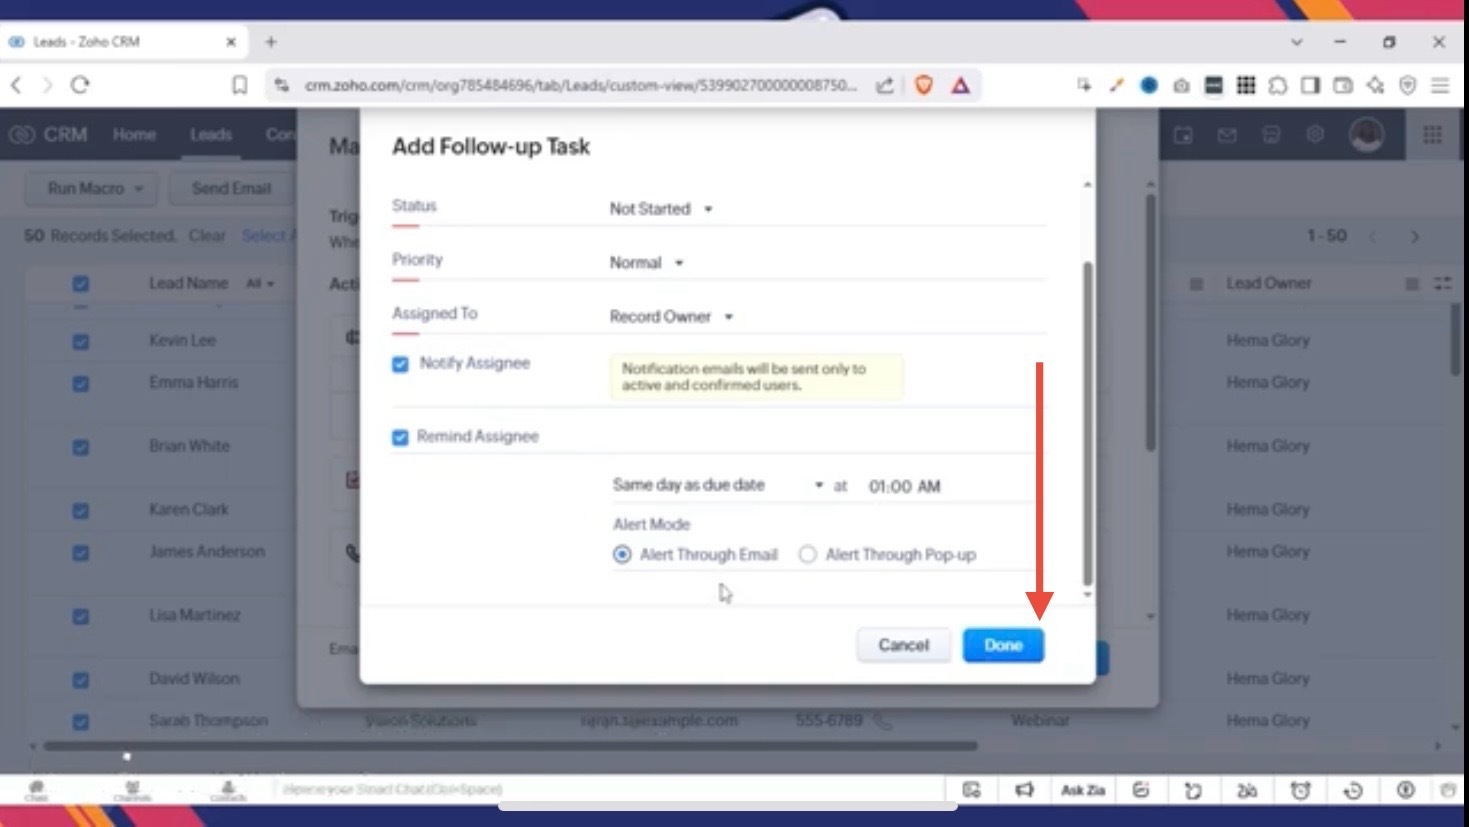
You can set up follow-up actions based on what recipients do. For example:
If someone opens the email → update their Lead Status to Contacted
If someone clicks the email → update their Lead Status to Interested
Create a follow-up task automatically like “Call this lead”
Schedule a call or prompt a next step
This keeps your CRM clean instead of guessing who is engaged. Zoho helps you track through actions and keep it simple.
Step 7: Review Everything and Schedule or Send
Before you hit send, do one calm final check:
Did you select the right list of people?
Is the correct template chosen?
Is the sender/reply-to correct?
Did you schedule the correct date/time?
Are your follow-up actions reasonable?
If everything looks good, click Send or Schedule.
If you don’t want to start from the Leads/Contacts list, you can also go through the CRM menu:
Click Actions
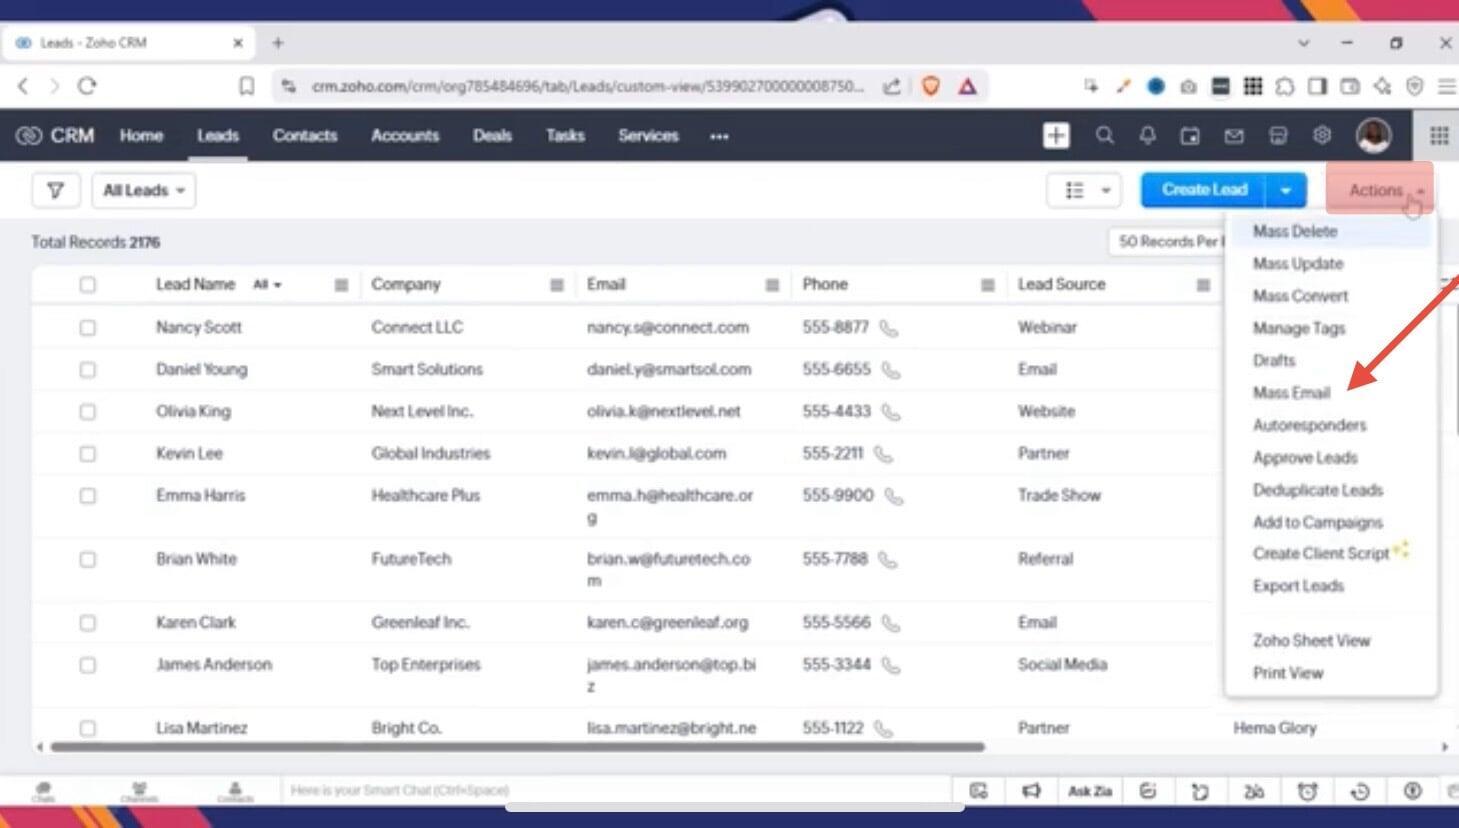
- Choose Mass Email
From there, you can view your drafts and scheduled mass emails, and even build a sequence by adding follow-up emails.
Conclusion
Sending mass emails in Zoho CRM is really just about understanding the flow and being intentional with your choices. Once you know who you’re emailing and you have a template ready, the rest of the process falls into place naturally.
If you’re new to Zoho CRM, it’s completely fine to start simple. You don’t need to use every option or automation right away. Even sending one well-targeted mass email can save you time and help you stay organized. As you get more comfortable, you can explore follow-up actions and scheduling in a way that fits your workflow.
The more you use the Mass Email feature, the more it starts to feel like a normal part of how you work in Zoho CRM rather than something you have to think too hard about.
Still Wondering What This Looks Like Inside Zoho CRM?
CRMInstructors has a video tutorial that walks you through the same steps visually, so you can follow along with confidence.