
If you’re new to Zoho CRM, importing contacts from Excel or Google Sheets can feel overwhelming. Doing it correctly saves time, avoids errors, and ensures your CRM data stays organised. This guide walks you through the process step by step, making it easy for beginners to import contacts into Zoho CRM without missing a thing.
Step 1: Prepare and Check Your Fields
Before importing, review your spreadsheet and make sure every column corresponds to a field in Zoho CRM. Any missing field will not be imported, which could leave your contacts incomplete.
- Click the Settings icon in Zoho CRM.
- Navigate to Modules and Fields → Contacts → Fields.
Check existing fields such as First Name, Last Name, Email, Phone, and Company.
Tip: Use consistent naming in your spreadsheet. For example, “Email Address” in your sheet should match “Email” in Zoho CRM.
If any columns from your spreadsheet don’t exist in Zoho CRM, you’ll need to create them before importing.
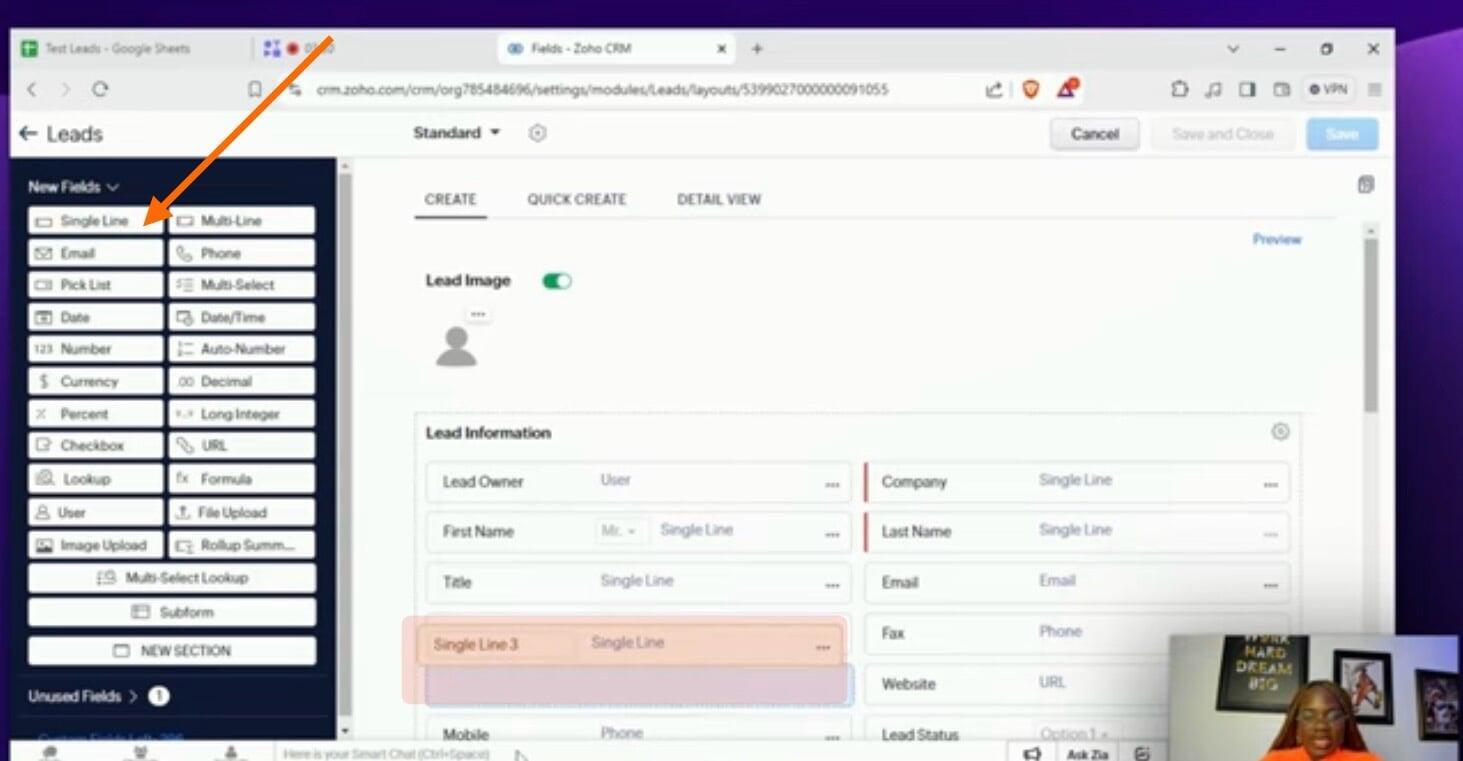
Step 2: Create Missing Fields
For any missing fields:
Click Create and Edit Fields in the Contacts module.

2. Choose the appropriate field type:
SingleLine: For short text like Job Title or Department
Picklist: For fields with predefined options, like Contact Source or Contact Status
Number: For numeric data like Number of Employees
Currency: For fields like Annual Revenue
URL: For websites
Multi-Line: For notes or descriptions
3. Drag the field into the layout and name it exactly as it appears in your spreadsheet.
Examples:
- Job Title → Single Line field
- Contact Source → Picklist (add options like Website, Email, Social Media)
Contact Status → Picklist (e.g., New, Active, Inactive)
Address (Street, City, State, Postal Code)
Industry (Picklist)
Annual Revenue (Currency)
Number of Employees (Number)
Website (URL)
Description (Multi-Line)
Tags (update according to your sheet, e.g., Hot, Warm, Cold)
Tip: Color-code picklist options for easy visual reference, and decide which fields are required.
Step 3: Import Contacts
Once your fields are ready:
Go to the Contacts module.
Click Import Contacts → Browse → Select your Excel/CSV file.
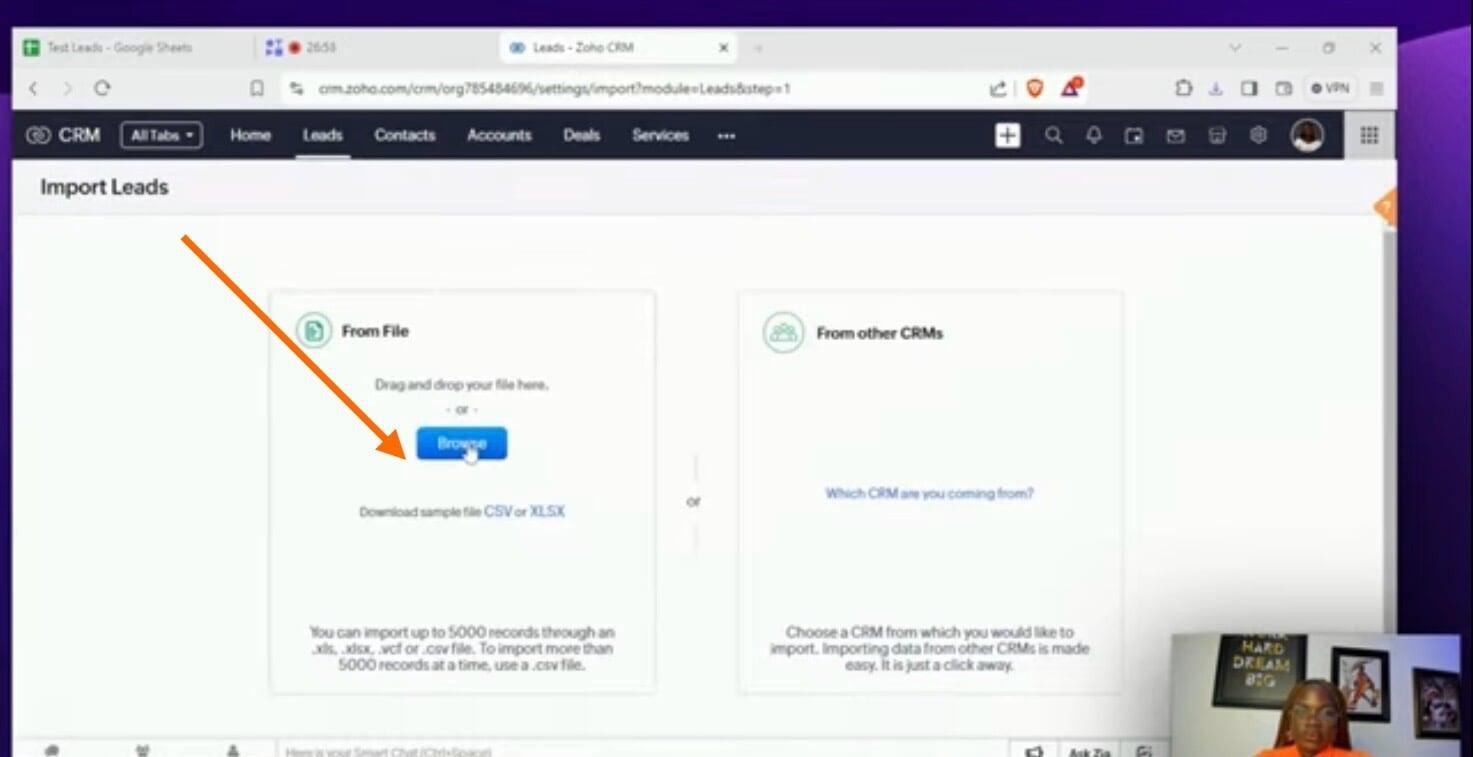
3. Choose Add as New Contacts.
Duplicate handling: You can skip importing a contact if it already exists in your CRM. Typically, the system checks by Email or Contact ID. This prevents duplicate records.

Tip: If your spreadsheet has updates for existing contacts, you can also choose “Update Existing Contacts” instead of adding new ones.
Step 4: Map Your Fields
Zoho will display a field mapping screen. Match each spreadsheet column to the corresponding Zoho CRM field:
- Last Name → Last Name
- Phone → Phone
Company → Company
Job Title → Job Title
Contact Source → Contact Source
Contact Status → Contact Status
Address → Street
City → City
Tags → Tags
Check that every column has a corresponding field. If something is missing, you’ll need to go back to Step 2 and create the field.
Tip: Double-check picklists—spelling must match exactly between your spreadsheet and CRM options.
Step 5: Optional Settings
Before finishing, Zoho CRM gives optional settings:
- Automation triggers: Automatically run workflows based on imported data.
- Assignment rules: Assign contacts to specific team members automatically.
Manual approval: Skip if all contacts are verified; otherwise, manually approve contacts before they become active.
Tip: For beginners, it’s safest to skip optional rules unless you’re confident in your setup.
Step 6: Complete the Import
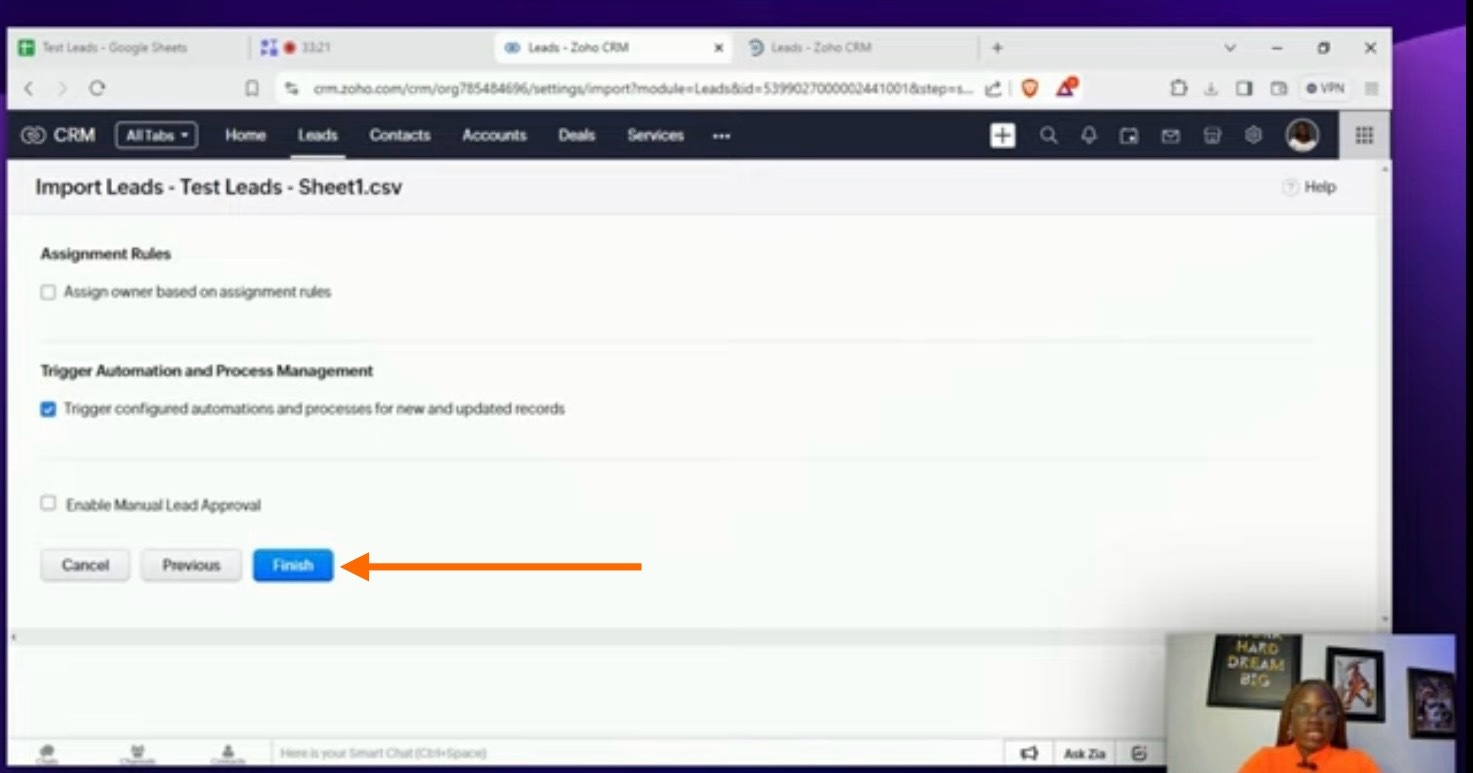
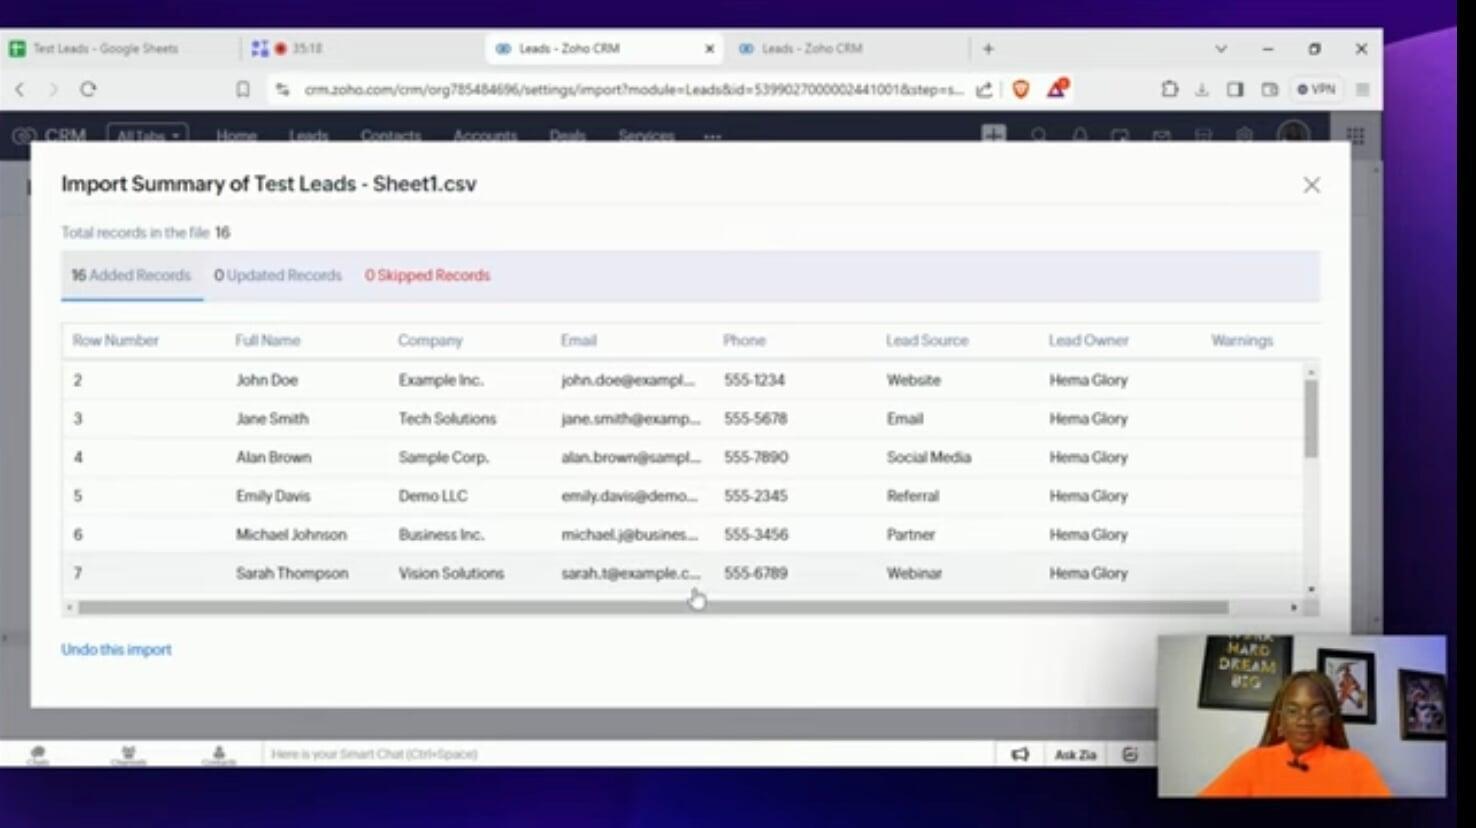
ClickFinish. Zoho CRM will display a summary:
Number of contacts added
Number of contacts updated
Number of contacts skipped
You’ll also receive a notification when the import is complete. If needed, you can undo the import to remove all newly added contacts.
Tip: Always keep a backup of your spreadsheet before importing, just in case.
Step 7: Review Your Imported Contacts
After import:
Open the Contacts module.
Spot-check a few entries to make sure all fields are imported correctly.
Check picklist options, tags, and formatting.
This ensures your data is clean and ready for follow-ups or campaigns.
Conclusion
Importing contacts into Zoho CRM doesn’t have to be complicated. By checking your fields, creating missing ones, mapping correctly, and reviewing your data, you can bring all your contacts into Zoho CRM efficiently and accurately.
With everything in one place, you can manage relationships, track communication, and grow your business more effectively.
Keep Improving Your Email Marketing Skills
Discover more hands-on tutorials and clear explanation on our YouTube channel to help you confidently navigate Zoho CRM