
If you want to create a sales pipeline in Zoho CRM that actually works for your business, this guide is for you. A well-structured Zoho CRM sales pipeline helps you track deals from first contact to closing, giving your sales team a clear roadmap and allowing you to prioritise high-value opportunities.
Whether you’re new to Zoho CRM or looking to optimise your existing setup, this tutorial walks you through building a custom pipeline in Zoho CRM step by step.
A sales pipeline setup in Zoho CRM isn’t just for tracking deals—it’s essential for understanding your sales process.
With a pipeline, you can:
- See all your deals at different stages in one place.
- Identify bottlenecks and stages that need attention.
Prioritise deals based on urgency or potential revenue.
A clear pipeline ensures your team knows exactly what actions to take at each stage, improving efficiency and increasing your chances of closing deals.
For more practical CRM tutorials like this, subscribe to our YouTube channel and learn how to use Zoho CRM the smart way.
Step 1: Access Pipeline Settings in Zoho CRM
To get started with your custom pipeline in Zoho CRM:
- Log in to your Zoho CRM account.
- Click Settings in the top menu.

3. Under Customisation, select Pipeline.
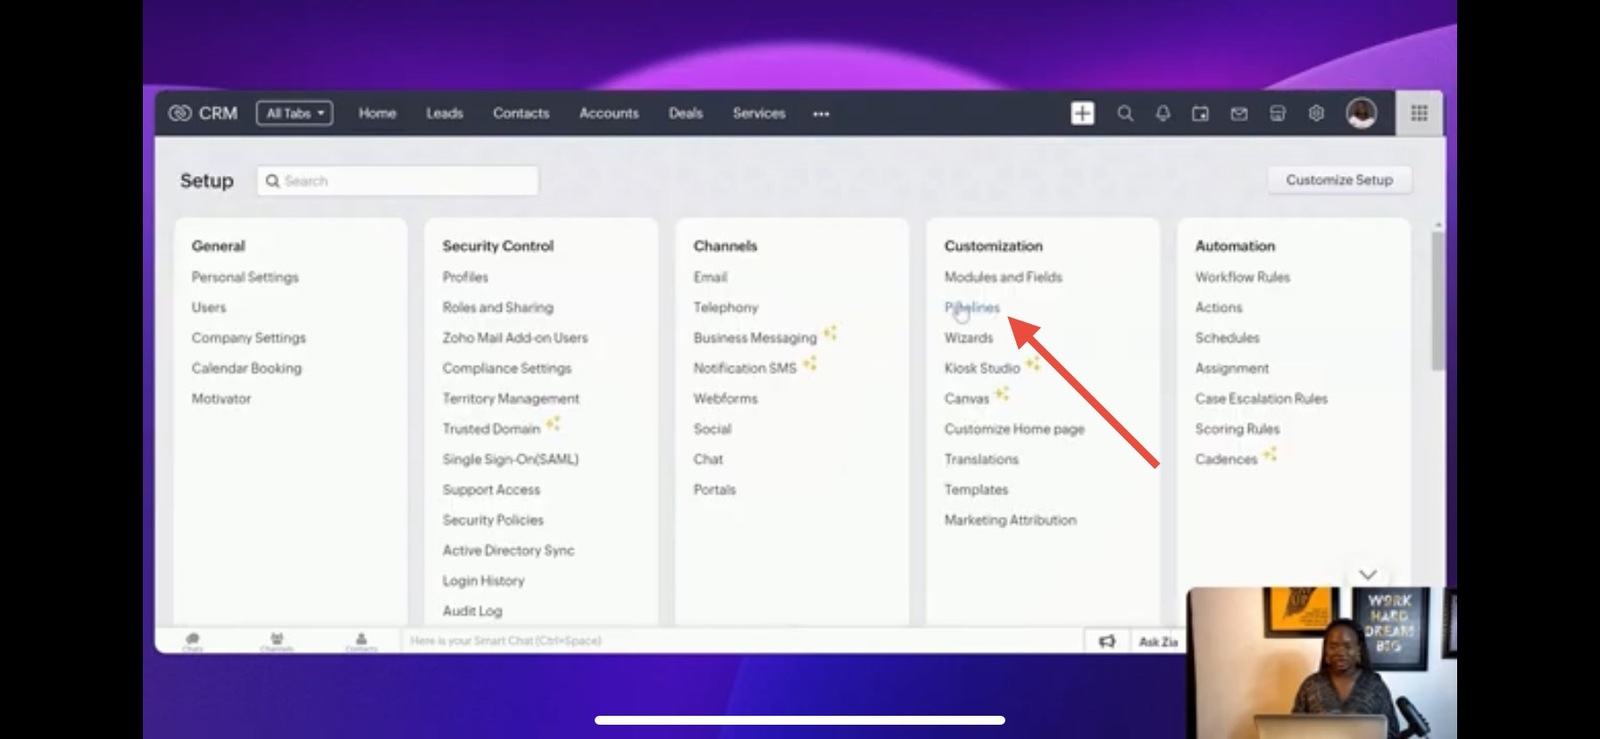
Here, you’ll see existing pipelines. For this tutorial, we’ll create a new pipeline from scratch.
Step 2: Create a New Sales Pipeline
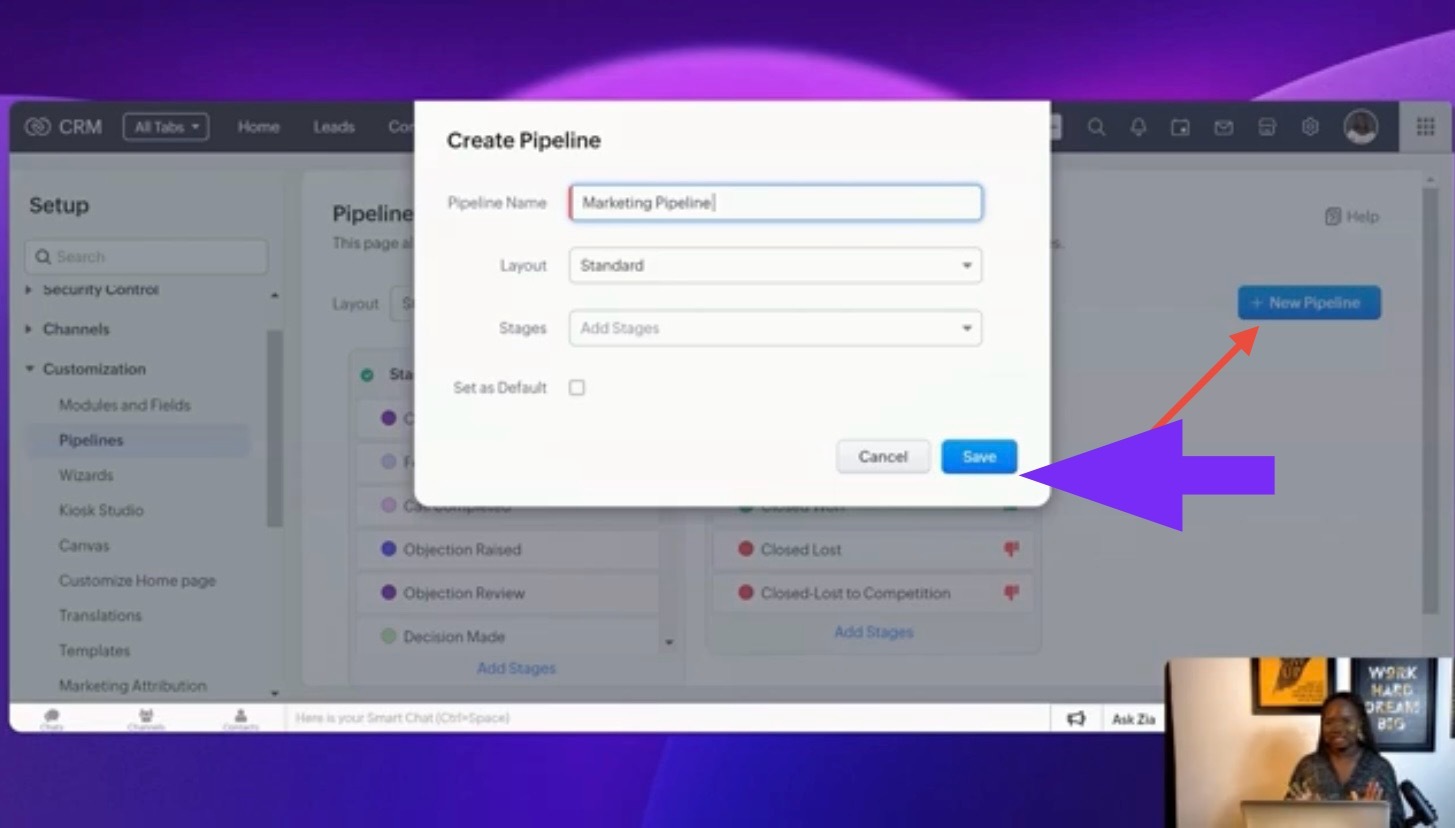
- Click New Pipeline.
- Give your pipeline a descriptive name, such as “Marketing Pipeline” for agency deals.
- Choose a layout—typically, the “Standard ” layout.
- Click Save to create the basic structure of your pipeline.
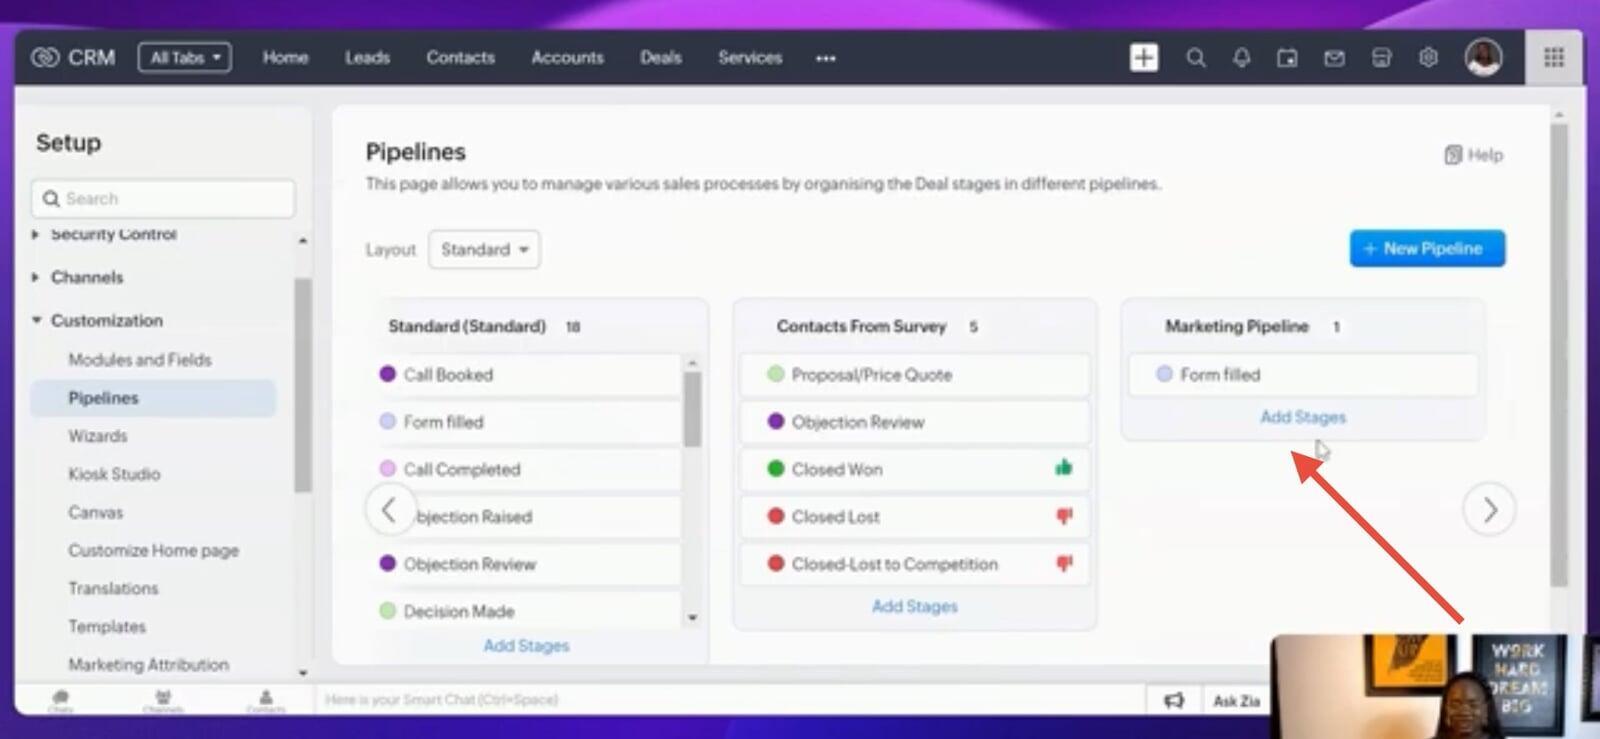
Step 3: Add Stages to Your Zoho CRM Pipeline
A sales pipeline in Zoho CRM is built from stages, each representing a step in your sales process.
To add stages:
Click Add Stages.
2. If a stage doesn’t exist, click Create New Stage.
3. Name the stage, assign a probability percentage (used for forecasting), and select the category (“Open” for active stages).
4. Click Done.
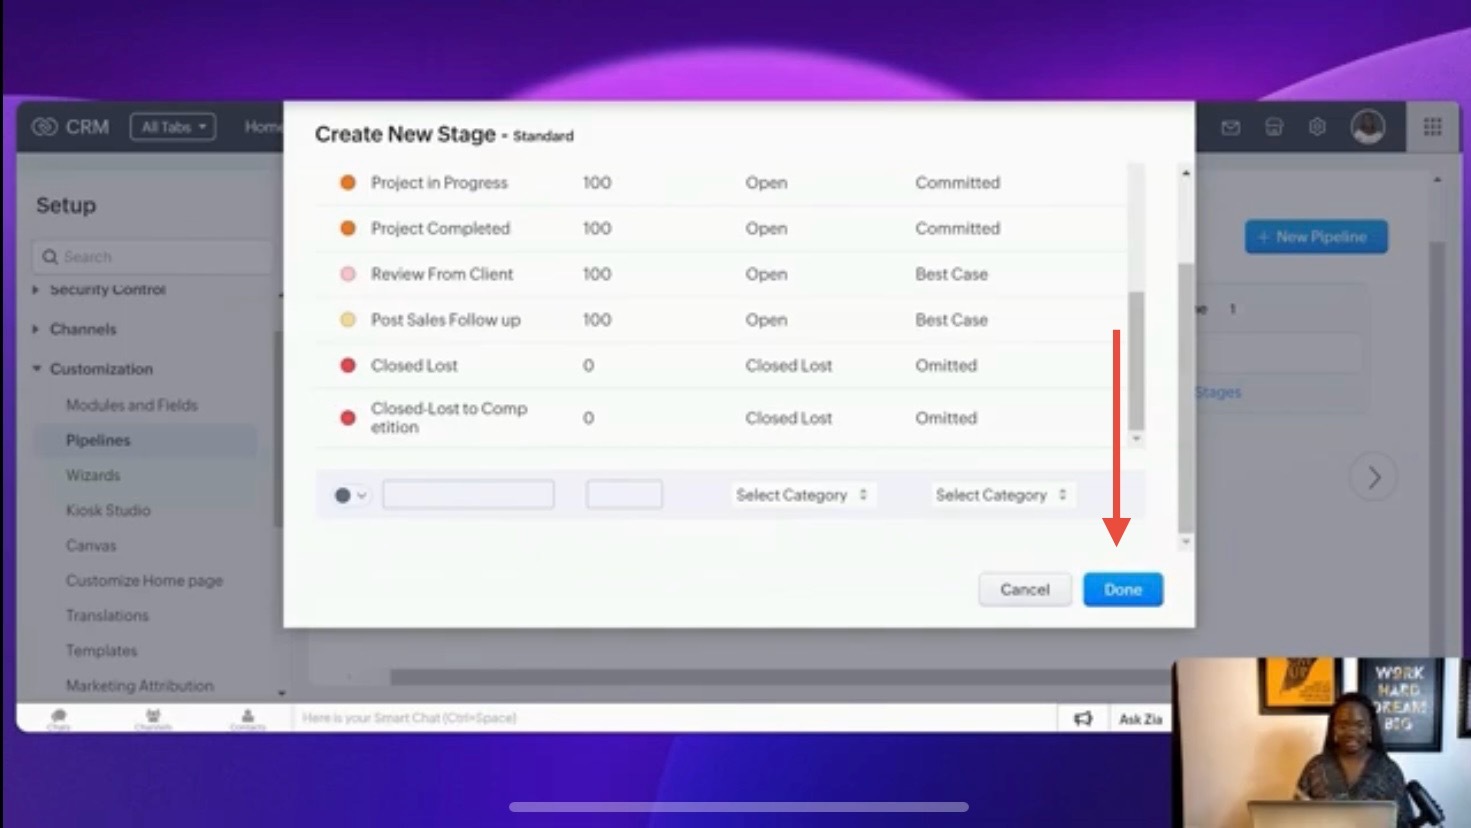
Repeat for all stages in your sales process.
Typical stages include:
- Lead Qualification
Initial Contact
Need Assessment
Proposal Development
Proposal Presentation
Closed Won
Closed Lost
Closed Lost to Competition
Make sure the stages flow logically through your sales journey.
Step 4: Save and Set the Default Pipeline
After adding all stages:
- Click Save to finalise the pipeline.
- Click the three-dot menu next to your pipeline and choose Set as Default.
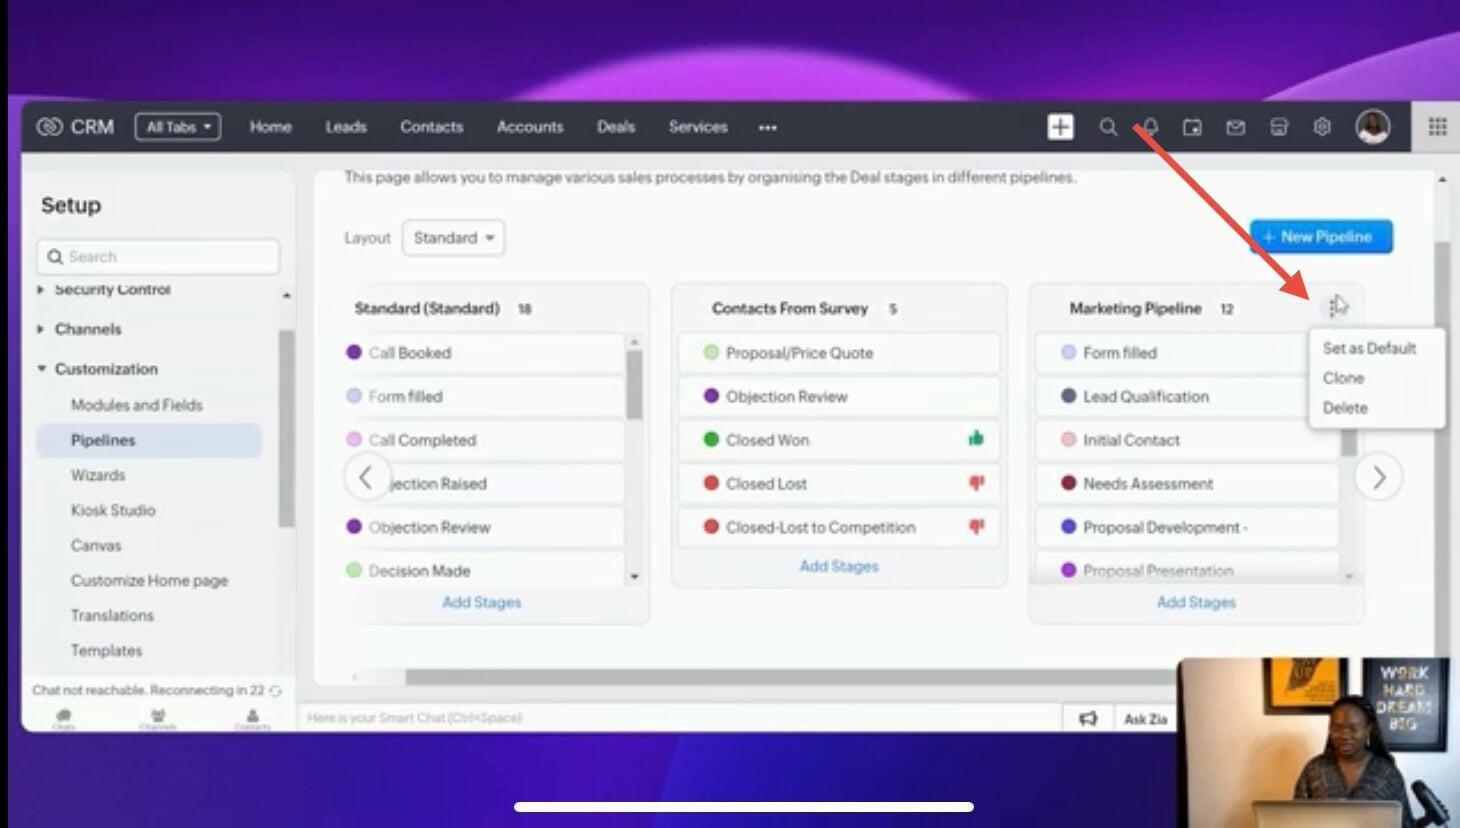
This ensures your new Zoho CRM sales pipeline appears first in the Deals module.
Step 5: Start Using Your Pipeline
Once your pipeline is active:
Go to the Deals module.

- Your default view now shows the new pipeline.
- Begin creating deals under each stage to track them throughout the process.
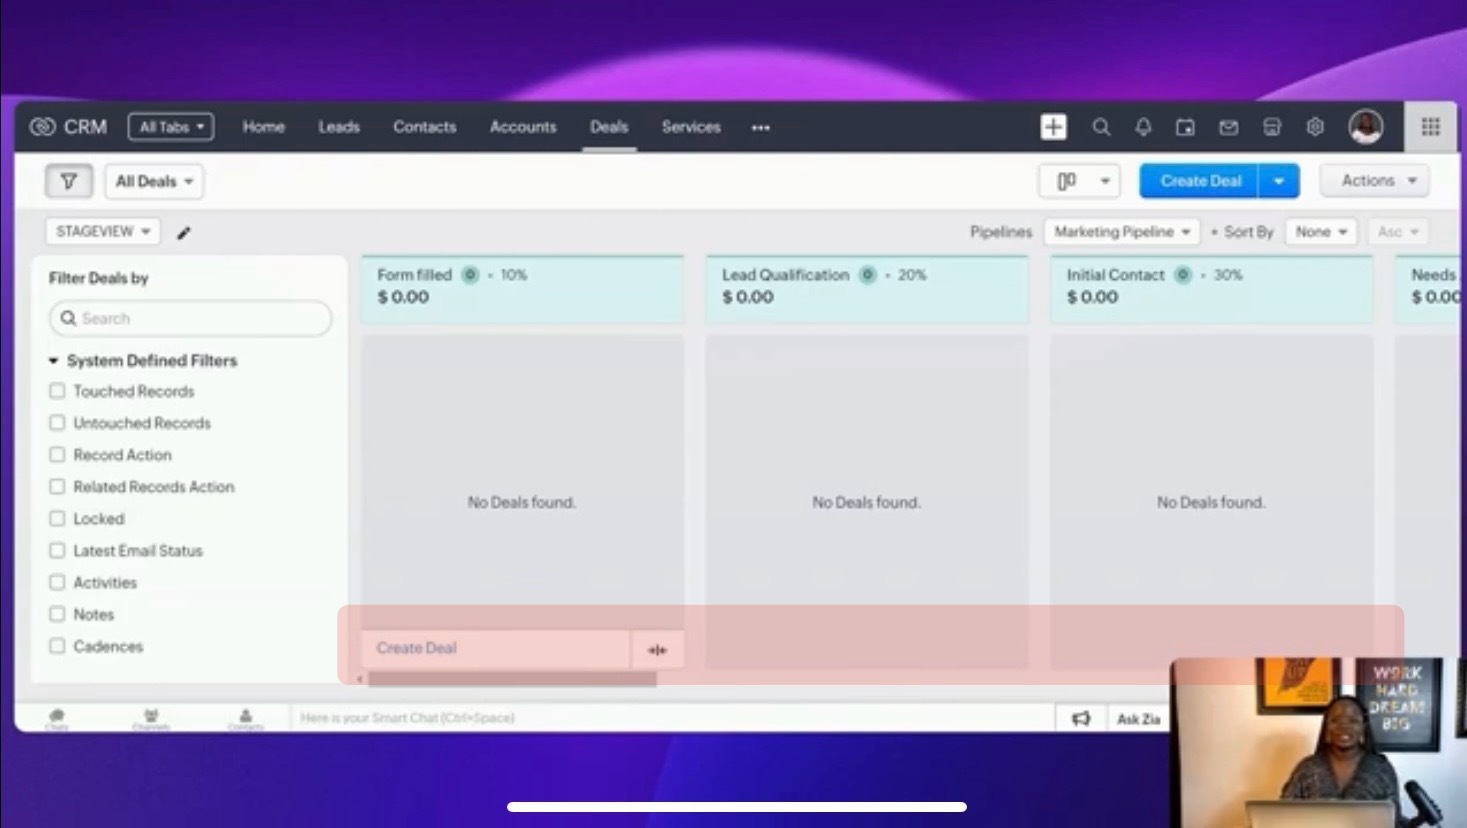
A properly configured sales pipeline setup in Zoho CRM ensures no deal slips through the cracks and makes it easy to monitor your team’s progress.
Conclusion
Building a custom pipeline in Zoho CRM is a powerful way to streamline your sales process. By defining stages, setting probabilities, and prioritising deals, you can improve visibility, efficiency, and forecasting accuracy.
Start setting up your pipeline today, and you’ll see how much easier it is to manage leads, track deals, and close sales in Zoho CRM.
Prefer Learning By Watching?
Watch the full step-by-step tutorial on our YouTube channel and follow along as we build the pipeline live.