
Creating a sales pipeline in HubSpot can help you organize your sales process, track deals, and close more business efficiently. In this step-by-step guide, we’ll walk you through setting up your HubSpot CRM pipeline, customising deal stages, and managing deals effectively.
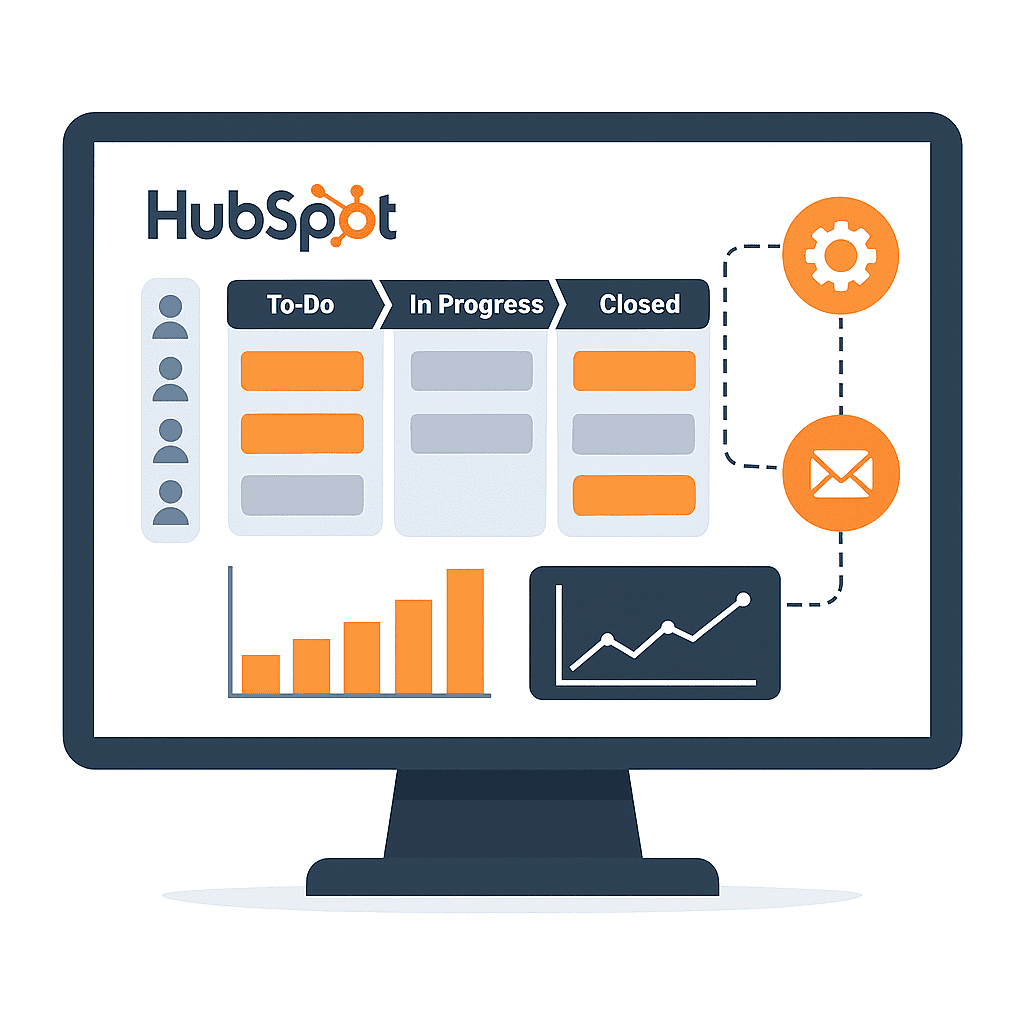
A sales pipeline in HubSpot is more than just a list. It’s a visual roadmap of your sales process, showing where each deal stands and what needs to happen next.
With a HubSpot CRM pipeline, you can:
- See all active deals in one place
- Track progress through defined stages
- Forecast sales based on real data
- Identify gaps in your process
- Keep sales activities moving consistently
Once it’s set up, your team spends less time guessing and more time selling, making your setup more effective.
Step 1: Log in and Access Pipeline Settings
Before you can start building a pipeline, you need a HubSpot account.
- If you don’t have an account, create a new HubSpot account.
- If you already have one, simply log in and access your dashboard.
Step 2: Access the Pipelines Section
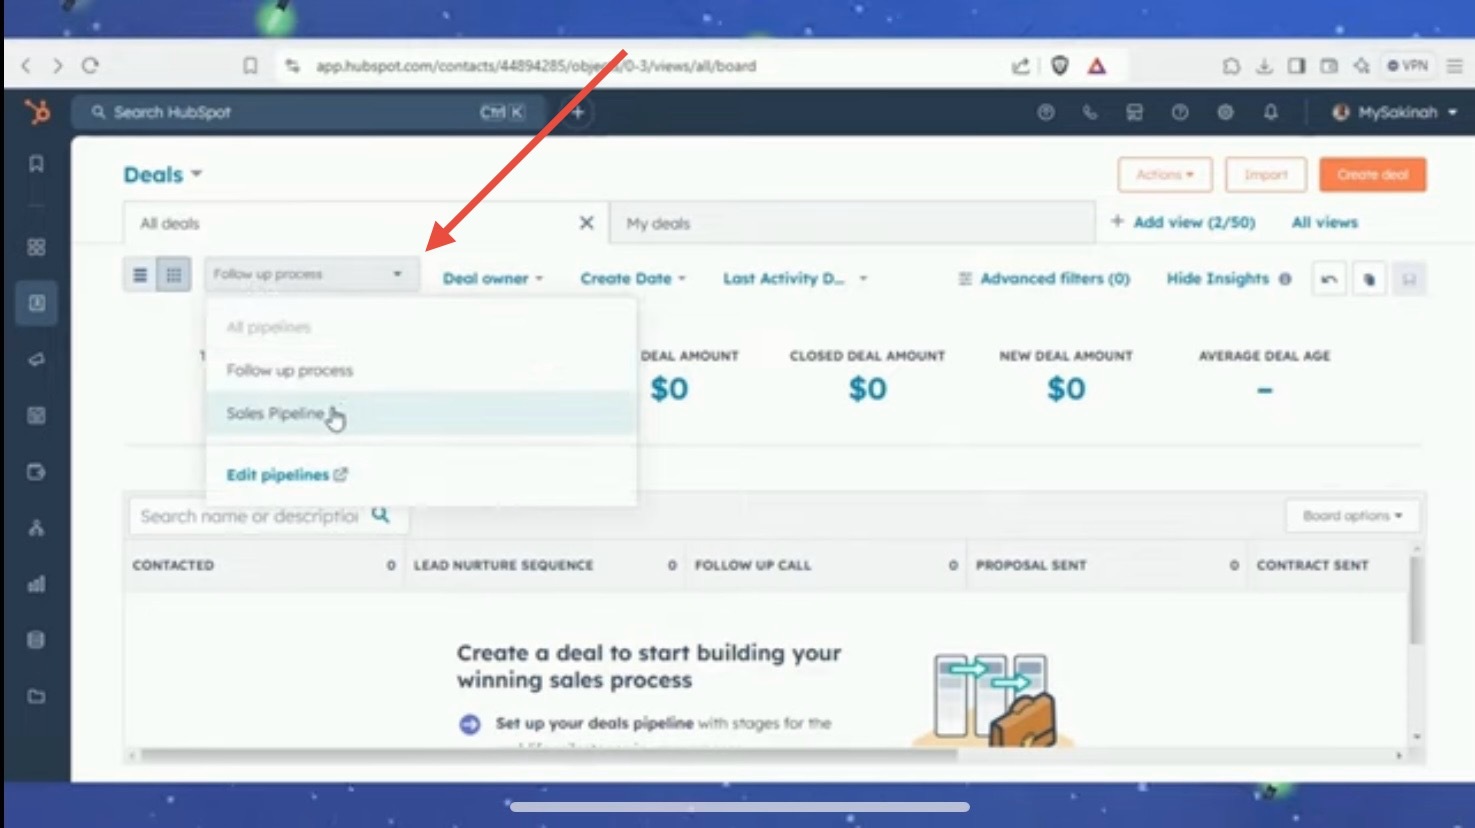
There are two ways to start your HubSpot sales pipeline setup:
1. Through CRM Deals:
- Go to CRM → Deals.
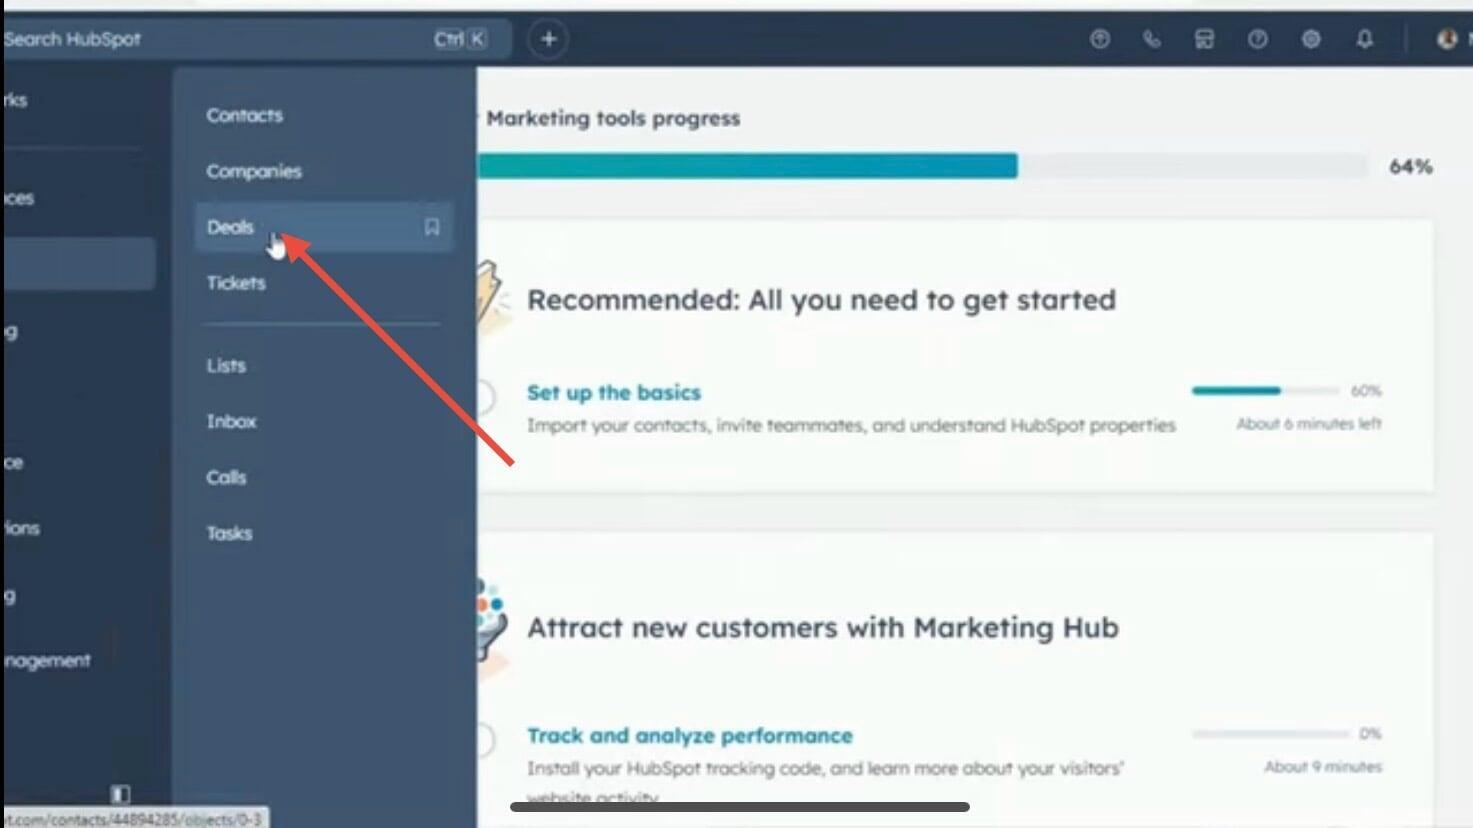
Click the Pipeline dropdown and select Edit Pipeline.
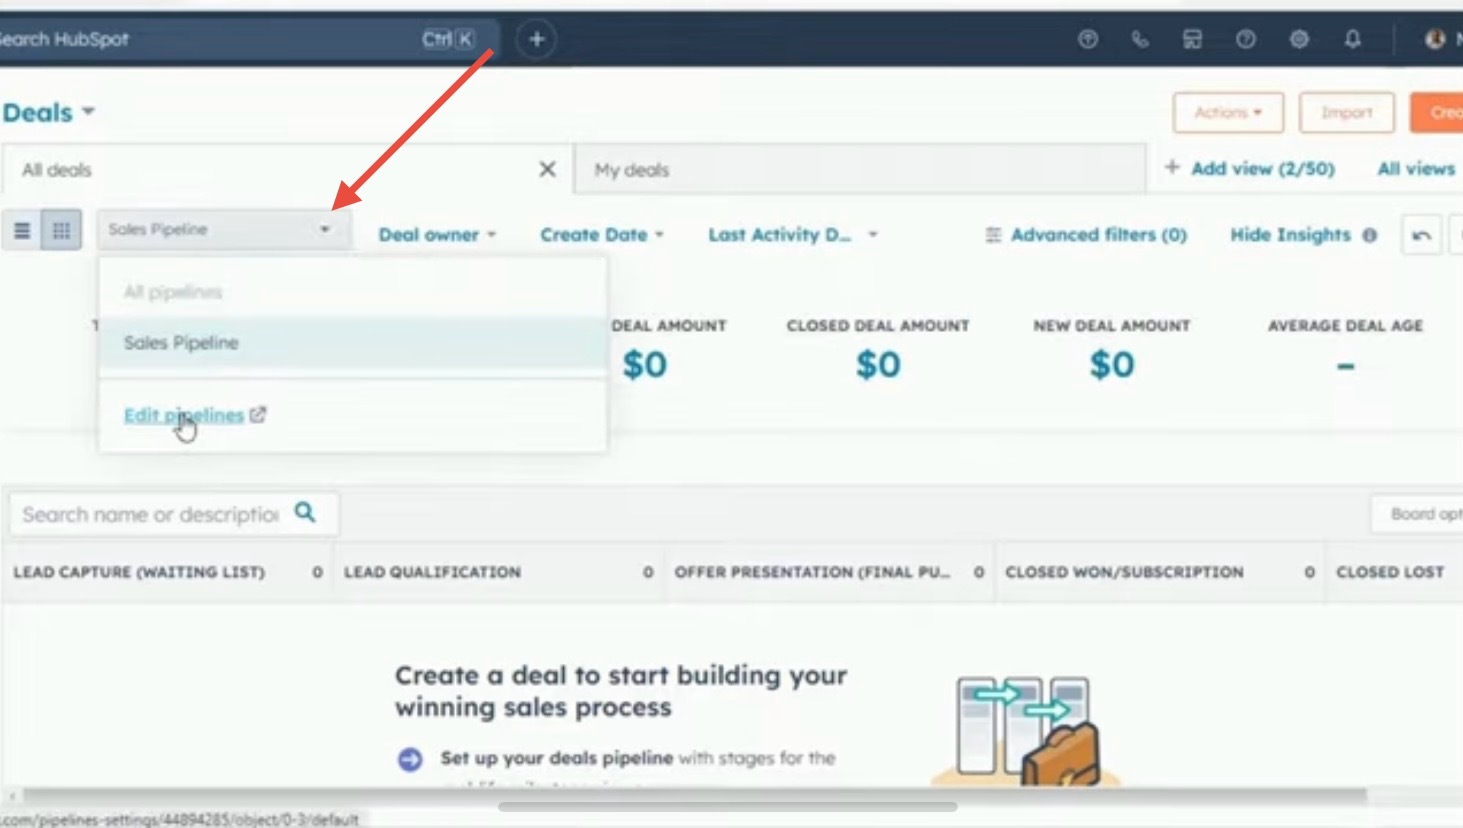
Here you can edit your current pipeline or click “Create Pipeline” to start a new one.
2. Through Settings:
- Click the dropdown and select Create Pipeline.
- Give your pipeline a name (e.g., “Follow-Up”) and click Create Pipeline.
Step 3: Customise Your Deal Stages
HubSpot automatically adds default deal stages, but you can edit them to fit your sales process:
Rename stages to match your workflow (e.g., “First Appointment Scheduled” → “Contacted”).
Examples of stages you might create:
- Contacted
- Lead Nurturing Sequence
- Follow-Up
- Proposal
You can also adjust the probability percentage for each stage to reflect the likelihood of closing the deal. Once you’re satisfied, click Save.
Step 4: Add Automation Rules (Optional)
If you’re on HubSpot’s Sales or Professional plan, you can create automations for each pipeline stage:
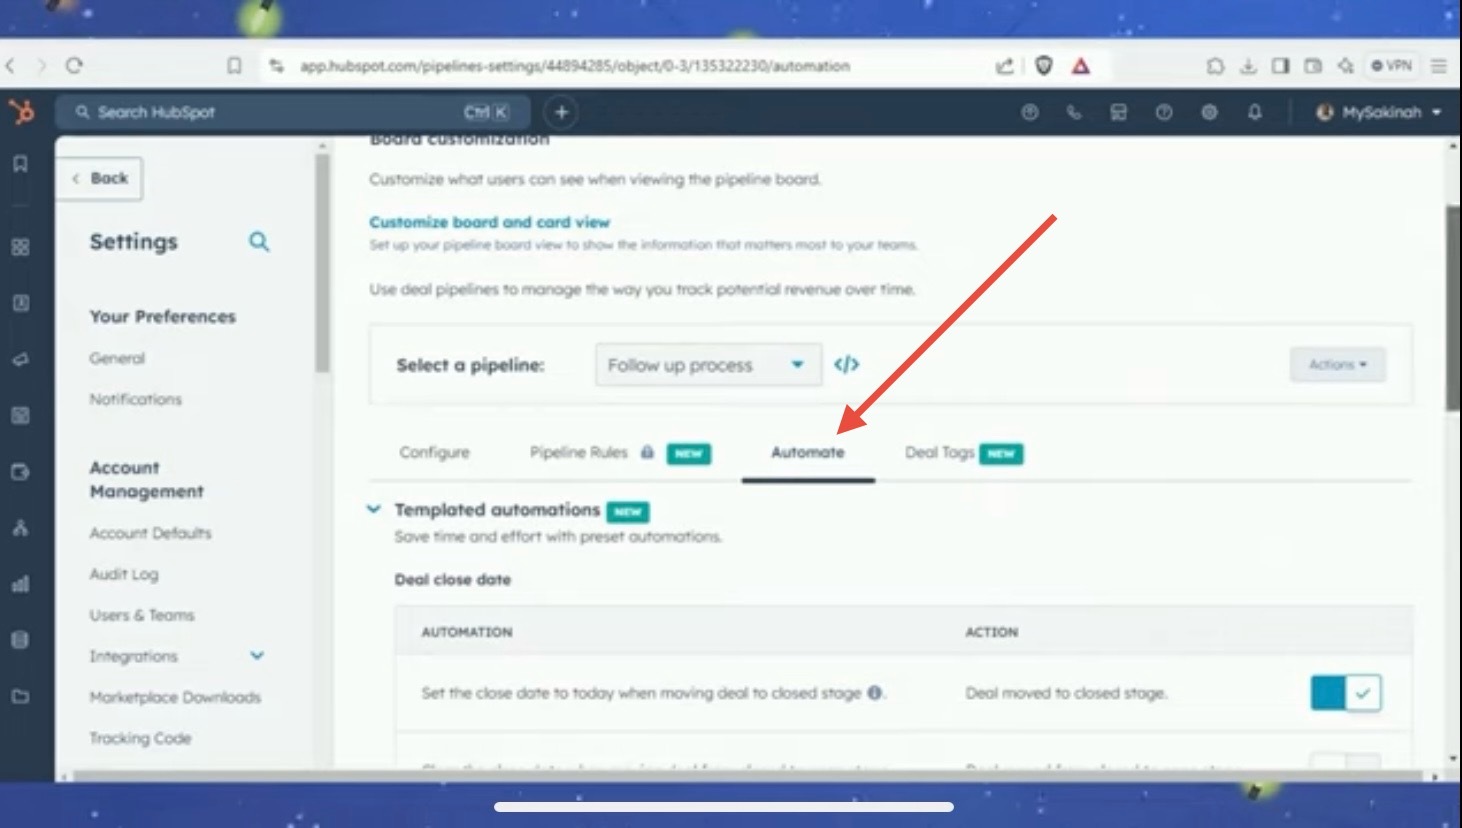
- Automatically set the close date when a deal moves to the Closed stage.
- Clear the close date if a deal moves back to an open stage.
- Create tasks, send internal notifications, or email contacts automatically.
Step 5: Manage Pipeline Settings
HubSpot lets you fine-tune your pipeline even further:
- Rename or reorder pipelines to show your preferred default.
- Manage access to control who can view or edit the pipeline.
Add Deal Tags to categorise deals (e.g., Overdue, High Priority).
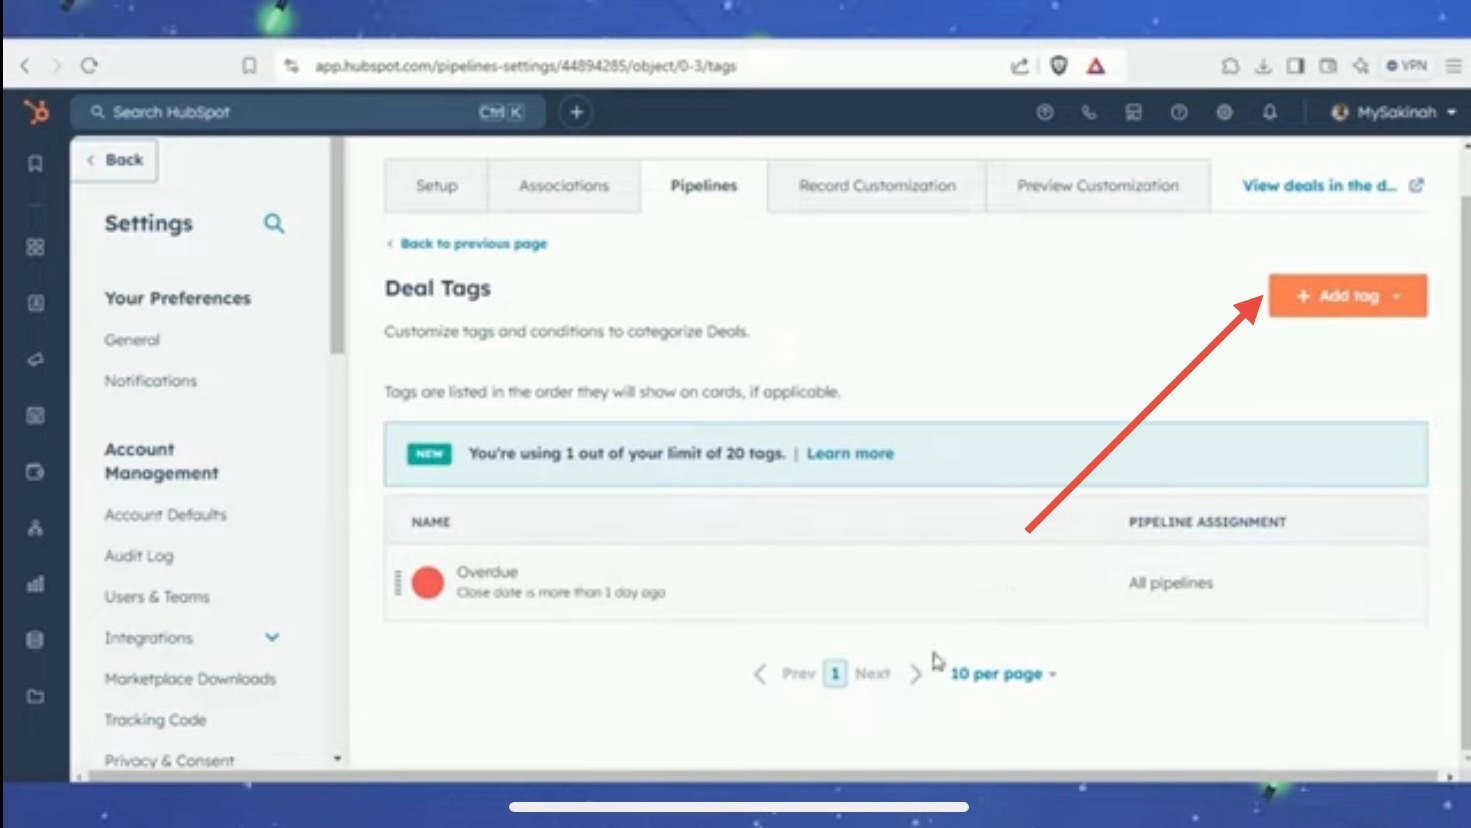
- Customise filters to apply tags automatically based on deal properties, like close date or deal amount.
You can create up to 20 tags per pipeline, making it easy to track and organise deals.
Step 6: Create Deals in Your Pipeline
Once your pipeline is ready, it’s time to create deals in HubSpot:
Go to CRM → Deals → Create Deal.
Enter your deal name.
Select the pipeline and the deal stage.
4. Add deal details:
- Amount
- Close date
- Deal type (new or existing business)
- Priority
Your deal will now appear in your HubSpot CRM pipeline, ready for tracking and management.
Step 7: Manage Deals in HubSpot
With your HubSpot sales pipeline and deals in place, you can:
- Track the progress of deals through each stage.
- Use automations and tags to stay organised.
- Analyse pipeline performance to identify bottlenecks.
This ensures your sales process runs smoothly and consistently.
Conclusion
Setting up a sales pipeline in HubSpot is straightforward and powerful. From creating a pipeline to customising deal stages and managing deals, each step helps you stay organised and close more business efficiently.
Take control of your sales process today by building your HubSpot CRM pipeline and start managing deals like a pro!
Take Control of Your
Sales Process Today
Check out our full HubSpot sales pipeline tutorial on YouTube and see exactly how each step is done.